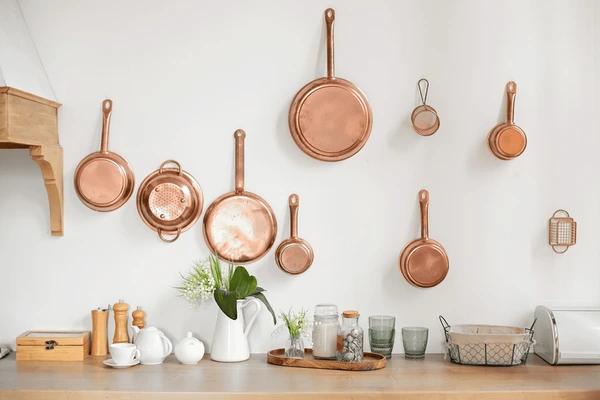
Spring Cooking 2025: Fresh Flavors and Seasonal Ingredients to Savor

As we step into 2025, the world of cooking continues to embrace the beauty of fresh, seasonal ingredients, and spring is the perfect time to experiment with vibrant flavors and lighter dishes. Spring cooking isn’t just about the ingredients—it’s a celebration of renewal, color, and fresh starts. The season brings with it a bounty of produce, from tender greens to juicy fruits, and this year’s culinary trends highlight the importance of sustainability, health, and creativity.

Whether you’re preparing a simple salad or a gourmet dinner, spring offers a chance to refresh your palate with lighter, brighter, and more colorful dishes. So, how can you make the most of spring’s ingredients and cooking trends in 2025? Let’s dive in.


1. Embrace Seasonal Vegetables and Greens

Spring vegetables are the star of the season, offering a variety of tender, fresh options that taste as vibrant as they look. This year, expect to see a greater emphasis on locally sourced, sustainable produce, as consumers and chefs alike continue to embrace farm-to-table cooking. Some of the must-have spring vegetables include:

  • Asparagus: Perfect for roasting, grilling, or even raw in salads. Asparagus is a great source of vitamins A, C, E, and K, and its earthy flavor pairs well with everything from citrus to parmesan.
  • Artichokes: Their tender leaves and heart make a beautiful addition to dips, pastas, or even grilled as a side dish. Artichokes are rich in antioxidants and a great way to add complexity to any meal.
  • Peas: Whether sweet peas or snap peas, they add a burst of color and flavor to any dish. This year, look for pea shoots and tendrils in salads and as garnishes.
  • Radishes: Crisp, peppery, and colorful, radishes are perfect in spring salads or roasted for a milder flavor. Their vibrant pink, red, and purple colors make them a showstopper on any plate.
  • Spinach & Arugula: The tender greens of spring are perfect for fresh salads, sautés, or adding to pastas and sandwiches. Look for heirloom varieties or wild greens to elevate your dishes.

2. Brighten Up with Spring Fruits

As the weather warms, fruits begin to ripen, and spring provides a variety of fresh options that make cooking feel like a celebration. Spring fruits are often juicy, tangy, and sweet, providing a refreshing contrast to the more savory notes of the season’s vegetables. Here are some fruits to watch for in 2025:

  • Strawberries: The quintessential spring fruit, strawberries are at their peak right now. Whether eaten fresh, pureed into a sauce, or folded into desserts, they add sweetness and color to every dish.
  • Citrus: Meyer lemons, grapefruits, and oranges are especially abundant in spring. Their bright acidity enhances both savory and sweet dishes, making them a great addition to dressings, marinades, and desserts.
  • Cherries: Sweet cherries are beginning to come into season in late spring, adding a luxurious, tangy sweetness to everything from tarts to glazes. Try them in a savory compote or paired with grilled meats for a surprising twist.
  • Rhubarb: Often paired with strawberries, rhubarb brings a tangy punch to spring dishes, particularly desserts like pies, crumbles, and compotes. It also works well in savory dishes, adding a sour contrast to rich meats.
  • Apricots & Peaches: These stone fruits start to appear in late spring, offering a delicate sweetness that pairs wonderfully with both sweet and savory flavors. Grilled apricots make for an excellent side dish, or they can be incorporated into salads.

3. Spring-Inspired Cooking Trends for 2025

In 2025, spring cooking is all about being light, fresh, and sustainable. Here are some key trends to look out for this year:

Plant-Based and Vegan Options

Plant-based cooking continues to gain traction, and spring is the perfect season to experiment with lighter, veggie-centric dishes. Think colorful bowls filled with quinoa, roasted spring vegetables, and creamy hummus, or a vegan spring risotto with peas and asparagus. Plant-based proteins such as lentils, chickpeas, and tofu are great for creating satisfying, nutrient-rich dishes.

Sustainability in the Kitchen

Sustainability remains a top priority in the kitchen. In 2025, expect more home cooks and chefs to focus on minimizing food waste, sourcing local ingredients, and prioritizing eco-friendly packaging. Spring is a great time to support your local farmers’ markets, buy in-season produce, and experiment with zero-waste cooking techniques, like using vegetable scraps for homemade broths or preserving herbs by making pesto or drying them.

Fermentation and Probiotics

Fermented foods are taking center stage this year, with more home cooks exploring the benefits of probiotics in their diets. Spring brings with it the perfect vegetables for fermentation, like cabbage for sauerkraut or radishes for kimchi. Incorporating fermented ingredients into your spring meals, whether as a tangy garnish or a side dish, can bring depth of flavor and an added health boost to your plates.
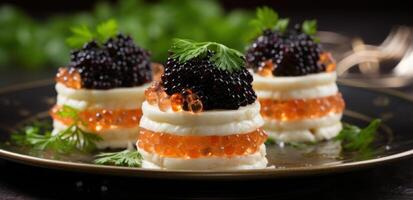
Elevated Salads

Salads are no longer just a side dish; in 2025, they’re becoming the centerpiece of meals. Rather than the typical mixed greens with dressing, think more in terms of roasted root vegetables, grains like farro or quinoa, and hearty ingredients like avocado or crispy chickpeas. The key is balance: vibrant greens, crunchy textures, and an umami-packed dressing to tie everything together. Add a protein such as grilled salmon or seared tofu to make the salad a satisfying main course.


4. Cooking Techniques for Spring

Spring is the season to embrace lighter, healthier cooking techniques that preserve the freshness of seasonal ingredients. Here are some methods to try in 2025:
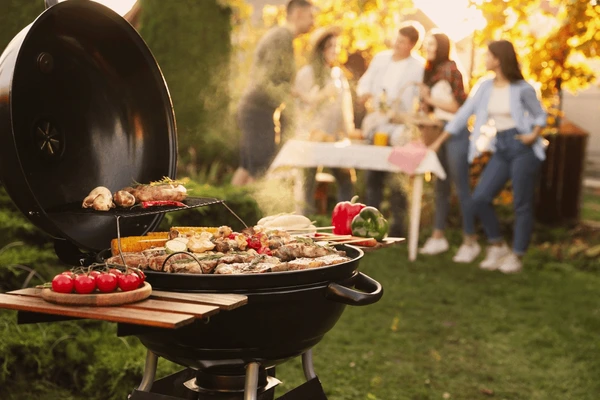
Grilling

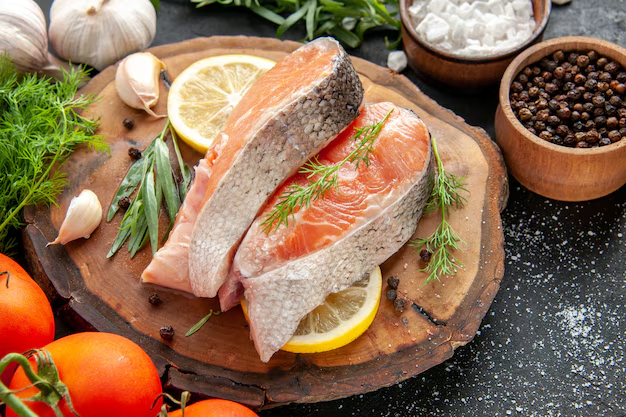
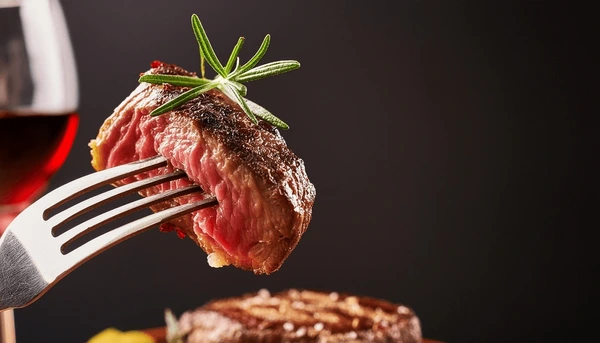
Grilling isn’t just for summer—spring is the perfect time to fire up the grill and enjoy the smoky flavors it adds to your dishes. Grilled asparagus, peaches, or spring onions bring a deeper flavor and a touch of char to salads and side dishes. Try grilling fish like salmon or trout for a simple and flavorful main course.

Roasting

Roasting is a classic technique for bringing out the natural sweetness of vegetables. Tender spring vegetables like carrots, radishes, and asparagus do especially well in the oven. Roasting them with olive oil, fresh herbs, and a little salt creates a caramelized, flavorful side dish that’s perfect for any spring meal.

Quick Sautéing

For delicate greens like spinach or arugula, quick sautéing is ideal. Sautéing in a little olive oil with garlic or shallots brings out the natural flavors without losing the vibrant color or nutrients. It’s a great technique for dishes like spring vegetable stir-fries or light pasta dishes.

Steaming

For the lightest touch, steaming vegetables retains their nutrients while allowing them to maintain their crispness and bright color. Spring peas, asparagus, or artichokes shine when steamed and served with a drizzle of lemon and olive oil.


5. Spring Cooking Recipes to Try in 2025

Grilled Salmon with Spring Vegetable Salad This fresh dish highlights the season’s best offerings. Grill a salmon fillet and pair it with a salad of roasted asparagus, snap peas, and radishes. Toss everything with a lemony vinaigrette and garnish with fresh herbs for a light, satisfying meal.

Spring Pea Risotto A creamy risotto made with fresh peas, mint, and parmesan makes for a perfect spring dish. The peas lend a burst of sweetness that balances the richness of the creamy rice, while mint adds a refreshing twist.

Strawberry-Rhubarb Crisp To celebrate spring’s fruits, this dessert combines the tartness of rhubarb with the sweetness of strawberries, topped with a buttery, oat-filled crumble. Serve it with a scoop of vanilla ice cream for the ultimate treat.


A Fresh Start in the Kitchen

Spring cooking in 2025 is all about embracing the abundance of seasonal ingredients, experimenting with new trends, and focusing on light, fresh flavors that celebrate the season’s bounty. By incorporating more plant-based options, sustainability, and simple yet elevated cooking techniques into your meals, you can create dishes that feel as fresh as the season itself.

So, as the days grow longer and the weather warms up, it’s time to bring those vibrant spring colors to your kitchen and enjoy the delicious fruits and vegetables that make this season truly special. Happy spring cooking!

Using the Right Pots and Pans: A Guide to Choosing the Best Cookware for Every Dish

When it comes to cooking, the right tools can make all the difference — and that includes choosing the right pots and pans. While it may seem like a simple decision, selecting the appropriate cookware can impact the quality of your dishes, the speed of your cooking, and even the durability of your kitchen essentials. From searing a steak to simmering a delicate sauce, the right pot or pan ensures even heat distribution, prevents sticking, and enhances the overall cooking experience.

In this article, we’ll explore the various types of pots and pans available, the materials they’re made from, and how to choose the right one for your culinary needs.


Why the Right Pots and Pans Matter

Using the proper cookware is essential for several reasons:

  • Even Heat Distribution: Some pans conduct heat better than others, ensuring your food cooks evenly without hot spots.
  • Cooking Performance: The right material can affect how your food browns, sears, or simmers. Using the wrong pan might lead to burnt edges or undercooked centers.
  • Ease of Cleaning: Certain materials make for easier cleanup, while others require more maintenance but offer superior cooking results.
  • Durability: Investing in high-quality cookware ensures longevity, preventing warping, scratching, or other forms of wear and tear.
  • Health and Safety: Some cookware options (like nonstick) can be harmful if scratched, while others (like cast iron) offer non-toxic cooking surfaces.

Types of Pots and Pans: Materials and Their Uses

Understanding the different types of cookware materials is key to making the best choice for your cooking style. Here’s a breakdown of the most popular materials and their benefits:

1. Stainless Steel

  • Best for: Searing, sautéing, boiling, browning
  • Why it’s great: Stainless steel is durable, non-reactive, and resistant to rust and stains. It’s ideal for cooking foods that require high heat, such as meats and vegetables. Stainless steel pans often feature an aluminum or copper core for better heat conduction, making them a great all-purpose choice.
  • Cooking Tip: Stainless steel pans are excellent for browning and deglazing, but be sure to preheat your pan and use oil to prevent sticking.
  • Cleaning: Stainless steel is relatively easy to clean, though it may require a little scrubbing if food is stuck.

2. Cast Iron

  • Best for: Searing, frying, roasting, baking, slow-cooking
  • Why it’s great: Cast iron is prized for its incredible heat retention and even cooking. It’s perfect for dishes that require sustained heat, such as cornbread, stews, or steak. Cast iron cookware, especially when well-seasoned, develops a naturally nonstick surface over time, making it perfect for frying.
  • Cooking Tip: Preheat cast iron slowly to avoid cracking, and always use plenty of oil or fat when cooking. After use, be sure to clean and re-season the pan to maintain its nonstick properties.
  • Cleaning: Cast iron should never be soaked in water or washed with soap. Instead, clean with a stiff brush or scraper and dry immediately to prevent rusting. Regular seasoning (with oil) keeps it in good condition.

3. Nonstick

  • Best for: Cooking eggs, pancakes, delicate fish, sautéing vegetables
  • Why it’s great: Nonstick pans are perfect for low-fat cooking because they require little to no oil or butter. They provide an ultra-smooth cooking surface that allows food to glide off without sticking. Nonstick pans are especially useful for cooking eggs, pancakes, and other delicate items.
  • Cooking Tip: Use wooden, silicone, or plastic utensils to avoid damaging the nonstick surface. Always cook on low to medium heat to preserve the nonstick coating.
  • Cleaning: Nonstick pans are incredibly easy to clean, as food slides right off the surface. Avoid using abrasive sponges that can scratch the coating.

4. Copper

  • Best for: Sautéing, simmering, melting, candy-making
  • Why it’s great: Copper is an excellent heat conductor, making it ideal for recipes that require precise temperature control, such as candy-making or delicate sauces. Copper pans offer rapid responsiveness to heat adjustments, allowing cooks to have more control over their cooking.
  • Cooking Tip: Copper pans should ideally be lined with stainless steel or tin to prevent reactions with food. Always cook on low to medium heat and avoid overheating, as copper can tarnish.
  • Cleaning: Copper cookware requires a little more care. It’s important to clean it regularly to prevent tarnishing and maintain its beautiful shine.

5. Aluminum

  • Best for: Frying, sautéing, stewing, baking
  • Why it’s great: Aluminum is lightweight, affordable, and conducts heat well, making it an excellent choice for everyday cooking. It’s often used in pots and pans that need to be durable and heat-efficient without being too heavy.
  • Cooking Tip: While aluminum is great for many dishes, it’s prone to warping at high heat. Always choose anodized aluminum for better durability and scratch resistance.
  • Cleaning: Aluminum is easy to clean, but be sure to use non-abrasive sponges to avoid scratching the surface.

6. Ceramic

  • Best for: Sautéing, baking, simmering, nonstick cooking
  • Why it’s great: Ceramic cookware offers a non-toxic, eco-friendly cooking surface that’s naturally nonstick without any chemicals. Ceramic pans are easy to clean and often come in beautiful colors, making them as stylish as they are functional.
  • Cooking Tip: Ceramic cookware is generally safe to use at low to medium heat. It’s great for recipes that require gentle heat, such as delicate sauces and vegetables.
  • Cleaning: Ceramic pans are easy to clean and are dishwasher-safe in most cases. However, they can become chipped if dropped, so handle with care.

Choosing the Right Pots and Pans for Your Cooking Needs

Now that you’re familiar with the different materials and their uses, here’s a guide to help you choose the right cookware based on your cooking needs:

For Searing Meat

  • Best choice: Cast iron or stainless steel.
  • Why: Both of these materials allow for high heat and excellent browning, which is essential for developing a rich, caramelized crust on meat.

For Frying

  • Best choice: Cast iron or nonstick.
  • Why: Cast iron retains heat well, making it perfect for frying foods like chicken or potatoes. Nonstick is ideal for delicate items like eggs or fish, where you want to avoid sticking.

For Sauces and Simmering

  • Best choice: Copper or stainless steel.
  • Why: Copper pans give you precise control over temperature, making them ideal for sauces or melting sugar for candy. Stainless steel is durable and non-reactive, perfect for simmering sauces without any unwanted flavors.

For Baking

  • Best choice: Cast iron (for cornbread, frittatas) or stainless steel.
  • Why: Cast iron provides excellent heat retention for baked goods like cornbread, while stainless steel pans are great for roasting or baking meats and vegetables.

For Delicate Cooking (Fish, Eggs, Pancakes)

  • Best choice: Nonstick or ceramic.
  • Why: Nonstick pans make flipping eggs, pancakes, and delicate fish easy without the risk of sticking. Ceramic pans also offer a smooth surface and require little oil for cooking.

Care and Maintenance of Pots and Pans

To ensure the longevity and effectiveness of your cookware, proper care is essential. Here are some general tips:

  • Cast Iron: Season regularly with oil to maintain the nonstick surface and avoid rusting.
  • Stainless Steel: Use a gentle scrub brush to clean off any stains, and periodically polish to maintain shine.
  • Nonstick: Avoid high heat, and never use abrasive sponges that could damage the coating.
  • Copper: Regularly clean with a copper polish to maintain its shine and remove tarnish.
  • Aluminum: Avoid cooking with high heat, and store carefully to prevent dents.

Cooking Success Starts with the Right Tools

The right pots and pans can dramatically impact the quality of your cooking. By understanding the strengths and weaknesses of different materials, you’ll be able to make informed decisions and create meals with precision, ease, and flavor. Whether you’re searing a steak in cast iron, making a delicate sauce in copper, or frying eggs in nonstick, the key to great cooking starts with using the right cookware.

Investing in high-quality pots and pans and taking care of them properly will not only make your cooking more enjoyable but also ensure that your kitchen tools last for years to come. Happy cooking!

A Guide to Cooking Fish: Tips, Techniques, and Flavorful Recipes

Fish is a versatile and healthy protein that can be prepared in countless ways, offering a wide range of flavors, textures, and culinary possibilities. Whether you’re grilling a fresh catch, pan-searing a fillet, or steaming delicate seafood, knowing the best techniques for cooking fish can elevate your dish from simple to extraordinary.

In this article, we’ll explore different methods for cooking fish, essential tips for success, and some easy yet impressive recipes to try at home.


Why Cook with Fish?

Fish is a highly nutritious option for any meal. Packed with lean protein, healthy omega-3 fatty acids, and important vitamins and minerals, it’s a light yet satisfying choice that can complement almost any type of cuisine. Additionally, fish cooks faster than many other types of meat, making it a convenient choice for busy home cooks.

From flaky white fish like cod and haddock to rich and flavorful fatty fish like salmon and mackerel, there’s a fish for every taste preference and dietary need. The key to great fish lies in the preparation and the technique used to cook it.


Choosing the Right Fish

Before diving into cooking techniques, it’s essential to choose the right fish for your dish. Here’s a brief guide to help you decide:

1. Lean Fish

  • Examples: Cod, flounder, halibut, haddock, tilapia, sole
  • Characteristics: Mild, delicate flavor with flaky, tender flesh
  • Best for: Baking, broiling, poaching, and pan-searing
  • Cooking Tip: These fish can easily dry out if overcooked, so it’s important to monitor them closely.

2. Fatty Fish

  • Examples: Salmon, mackerel, trout, sardines, tuna
  • Characteristics: Rich, full flavor with a higher fat content, which makes them more forgiving during cooking
  • Best for: Grilling, roasting, pan-searing, and smoking
  • Cooking Tip: Fatty fish can handle higher cooking temperatures, and their natural oils help keep them moist.

3. Shellfish

  • Examples: Shrimp, lobster, crab, scallops, clams, oysters
  • Characteristics: Sweet, briny flavor with a firm texture
  • Best for: Grilling, steaming, poaching, and stir-frying
  • Cooking Tip: Shellfish cooks quickly, so be mindful not to overcook to avoid rubbery textures.

Essential Techniques for Cooking Fish

Cooking fish can be intimidating if you don’t know the right techniques, but once you get the hang of it, you’ll be able to create restaurant-quality dishes at home. Here are some essential methods to get you started:

1. Grilling

Grilling is a fantastic way to bring out the natural flavors of fish, especially fatty fish like salmon and mackerel. The high heat of the grill imparts a smoky flavor and creates a nice char.

  • Tips:
    • Use a fish basket or foil to prevent delicate fish from falling apart on the grill.
    • Brush the fish with oil or butter to keep it from drying out.
    • Preheat the grill and clean the grates to ensure a smooth cooking process.
  • Recipe Suggestion: Grilled Salmon with Lemon and Dill
    • Season salmon fillets with olive oil, salt, pepper, and fresh dill. Grill over medium heat for about 4-5 minutes per side, until the fish flakes easily with a fork. Serve with a squeeze of fresh lemon.

2. Pan-Seared

Pan-searing is a quick and easy method that results in a crispy, golden exterior and a tender interior. This technique works best for lean fish like cod or halibut, but it can also be used with fatty fish like tuna.

  • Tips:
    • Make sure the pan is hot before adding the fish to ensure a crispy crust.
    • Use a neutral oil (like vegetable or canola) for high-heat cooking.
    • Avoid overcrowding the pan to ensure even cooking.
  • Recipe Suggestion: Pan-Seared Cod with Garlic Butter
    • Season cod fillets with salt and pepper. Heat a little oil in a skillet and cook the fillets for about 3-4 minutes per side. For the last minute of cooking, add a tablespoon of butter, garlic, and fresh parsley, basting the fish in the flavorful sauce.

3. Baking

Baking fish is one of the simplest methods, and it’s perfect for fish fillets that can easily dry out on the stove or grill. Baking at a low to moderate temperature ensures the fish cooks gently and evenly.

  • Tips:
    • Wrap the fish in foil to retain moisture or place it on a parchment-lined baking sheet for easy cleanup.
    • Add herbs, citrus, and butter to enhance the flavor.
    • Check the fish regularly to avoid overcooking — it should reach an internal temperature of 145°F (63°C) when done.
  • Recipe Suggestion: Baked Lemon Herb Tilapia
    • Place tilapia fillets on a baking sheet, season with lemon zest, fresh thyme, garlic, and a drizzle of olive oil. Bake at 375°F (190°C) for 12-15 minutes, or until the fish is tender and flakes easily.

4. Poaching

Poaching involves cooking fish in simmering liquid, such as broth, wine, or water, which keeps the fish moist and flavorful. This technique is ideal for delicate fish like sole or halibut.

  • Tips:
    • Ensure the poaching liquid is simmering, not boiling, to prevent the fish from breaking apart.
    • Flavor the poaching liquid with herbs, lemon, and aromatics like onion or garlic.
  • Recipe Suggestion: Poached Salmon in White Wine
    • In a shallow pan, bring white wine, water, lemon slices, and fresh herbs to a simmer. Gently add salmon fillets and cook for 8-10 minutes, until the fish is just cooked through. Serve with a light drizzle of olive oil and fresh herbs.

5. Steaming

Steaming is a healthy and gentle way to cook fish, especially when preserving its natural flavors. This method works well for fish like bass, cod, and grouper.

  • Tips:
    • Use a bamboo steamer or a steaming rack placed over simmering water to cook the fish.
    • Add aromatic herbs and citrus slices to the steaming water to infuse the fish with flavor.
  • Recipe Suggestion: Steamed Grouper with Ginger and Scallions
    • Place grouper fillets on a heatproof plate and top with thinly sliced ginger, garlic, and scallions. Steam for 10-12 minutes, then drizzle with soy sauce and sesame oil for a burst of umami flavor.

Flavor Pairings for Fish

Fish is a naturally mild protein, so it pairs beautifully with a variety of herbs, spices, and seasonings. Here are some of the best flavor combinations to elevate your fish dishes:

  • Citrus: Lemon, lime, orange, and grapefruit brighten up the flavors of fish, enhancing its natural sweetness and adding a refreshing acidity.
  • Herbs: Dill, parsley, thyme, rosemary, tarragon, and basil complement the delicate nature of fish, adding freshness without overpowering it.
  • Spices: Paprika, cumin, coriander, and curry powder can bring a deeper warmth and complexity to the dish.
  • Aromatics: Garlic, ginger, onions, and shallots are often used to infuse fish with savory undertones.
  • Butters and Oils: A drizzle of melted butter, herb-infused oil, or a splash of lemon butter sauce can elevate the richness of the fish.

Perfecting the Art of Cooking Fish

Cooking fish doesn’t have to be daunting. By choosing the right fish and using the appropriate cooking technique, you can create delicious, restaurant-quality dishes at home. Whether you prefer the smoky char of grilled salmon, the crispy crust of a pan-seared fillet, or the delicate poached perfection of cod, there’s no limit to the flavors and textures you can explore.

Experiment with different herbs, spices, and flavor combinations, and most importantly, enjoy the process of cooking and savoring the fruits of your labor. With these tips and recipes, you’ll be cooking fish like a pro in no time!

Gold Ice Cream: The Epitome of Luxury in a Cone

In the world of extravagant desserts, gold ice cream stands as one of the most opulent and eye-catching indulgences. This decadent treat combines the cool, creamy comfort of traditional ice cream with the dazzling allure of gold leaf, creating a dessert that’s both a feast for the eyes and the palate. From the streets of New York to the luxury restaurants of Dubai, gold ice cream is quickly becoming the ultimate symbol of indulgence and sophistication.

But what exactly makes gold ice cream so special? And why is it so expensive? In this article, we’ll take a deep dive into the world of gold ice cream — exploring what it is, how it’s made, where to find it, and why it has earned its place in the luxury dessert world.


What is Gold Ice Cream?

Gold ice cream is exactly what it sounds like — ice cream adorned with real edible gold. While the ice cream itself is often made using high-quality ingredients like organic milk, cream, and sugar, it’s the gold leaf or gold flakes that truly elevate it. Gold leaf, a thin sheet of pure gold, is carefully applied to the surface of the ice cream or mixed into the base, giving it a stunning, shiny appearance.

Edible gold used in desserts is 23-karat or 24-karat gold. Unlike gold used in jewelry or coins, edible gold is pure gold that has been processed in such a way that it can be consumed safely. It has no taste or smell but offers a visual spectacle when applied to food.

Gold ice cream can range from a small sprinkle of gold flakes to full coverage with sheets of gold. Some versions even combine gold with other luxurious ingredients, like rare fruits, fine liquors, or extravagant toppings, making it not only a treat for the taste buds but also an Instagram-worthy moment.


How is Gold Ice Cream Made?

Making gold ice cream involves two key components: the ice cream itself and the gold leaf or flakes. The process of creating the ice cream follows the same steps as traditional ice cream-making, but with an added element of luxury. Here’s a simplified breakdown:

1. The Ice Cream Base

  • The base for gold ice cream is often made using premium ingredients, which may include organic dairy, rich vanilla beans, or exotic flavors such as saffron, pistachio, or truffle. These ingredients provide a smooth and creamy texture.
  • For some variations, a luxurious liquor like champagne, cognac, or whiskey might be incorporated into the ice cream to enhance its indulgence.

2. Gold Leaf Application

  • After the ice cream is prepared and scooped, sheets of edible gold are carefully applied. This can be done in several ways:
    • Gold leaf sheets are gently laid on the surface of the ice cream.
    • Gold flakes are sprinkled throughout the ice cream or placed on top as a garnish.
  • The gold leaf is delicate and requires precision to apply, so this part of the process is often done by hand. It’s not uncommon for artisans to take their time, ensuring that each piece of gold is positioned just right for maximum visual impact.

3. Optional Toppings and Additions

  • Many gold ice creams are served with additional luxury toppings such as candied fruits, caviar, or edible flowers. Some may also be paired with a drizzle of high-end chocolate or a touch of truffle oil to further elevate the flavor.

The result is a visually stunning and lavish dessert that feels as though it belongs in a royal banquet.


Why is Gold Ice Cream So Expensive?

The primary reason gold ice cream comes with a hefty price tag is due to the cost of the edible gold. Pure gold is naturally expensive, and the labor involved in creating and applying it to the ice cream only adds to the overall cost. Here’s a closer look at why gold ice cream can cost hundreds — or even thousands — of dollars per serving:

1. The Cost of Edible Gold

  • Edible gold is priced at a premium due to the high cost of gold itself. The gold used in food products is often 23-karat or 24-karat, meaning it is nearly pure, contributing to its expensive nature. A small sheet of gold may only weigh a few grams, but it’s still costly, especially when used in larger quantities.

2. High-Quality Ingredients

  • The ice cream itself is often made with premium ingredients. Organic dairy, exotic flavors, and sometimes alcohol (like champagne or cognac) all contribute to the cost. High-end ice cream makers go to great lengths to source the best ingredients to match the luxury of the gold.

3. Artisanal Craftsmanship

  • Creating gold ice cream is often an art form. It takes time and skill to craft the perfect scoop of ice cream, apply the gold leaf, and ensure every detail is executed flawlessly. This meticulous process adds to the cost, particularly when done by renowned chefs or luxury dessert creators.

4. Exclusivity and Branding

  • Gold ice cream is often marketed as a luxurious, exclusive product. Many high-end restaurants or celebrity chefs have capitalized on the trend, offering it as a limited-time or signature dessert. As a result, the price reflects not just the ingredients but the brand prestige and the experience of enjoying something truly unique.

Where to Find Gold Ice Cream

Gold ice cream is not something you’ll find in your local grocery store (unless you’re in a very special section). Instead, it’s mostly available at high-end restaurants, specialty shops, and luxury hotels around the world. Here are some of the most famous places to indulge in this opulent treat:

1. Serendipity 3 (New York City, USA)

  • Frrrozen Haute Chocolate: One of the most famous gold ice cream creations in the world, Serendipity 3’s “Frrrozen Haute Chocolate” is a $25,000 dessert topped with 23-karat gold leaf and served in a 18-karat gold and diamond-studded goblet. This ice cream is made with rare chocolate, 5 grams of edible gold, and a side of champagne.

2. Scoopi Cafe (Dubai, UAE)

  • The Black Diamond: Served for $1,000, The Black Diamond is one of the most expensive ice cream dishes in the world. It features a blend of vanilla ice cream made with Madagascar vanilla beans, Iranian saffron, and gold leaf. The ice cream is topped with a sprinkling of truffle and served with a shot of the finest cognac.

3. The Glacé Luxury Ice Cream (Los Angeles, USA)

  • Gold-Dusted Ice Cream: Known for serving some of the most luxurious ice creams in the U.S., The Glacé offers gold-dusted ice cream creations that are made from organic milk and seasonal ingredients, topped with gold leaf for a touch of elegance.

4. Palazzo Versace (Dubai, UAE)

  • 24-Karat Gold Gelato: Served at the Versace-branded hotel, this gelato is a true luxury experience, with the gelato base made from rare ingredients such as Madagascar vanilla and organic milk, and then topped with 24-karat gold leaf.

Is Gold Ice Cream Safe to Eat?

Yes, edible gold is completely safe to eat. It’s chemically inert, meaning it doesn’t react in the body and passes through the digestive system without causing harm. Unlike other precious metals, gold is non-toxic and doesn’t dissolve or release harmful substances when consumed. However, it’s important to note that gold doesn’t add any flavor or nutritional value to the ice cream — it’s purely for visual impact.


The Appeal of Gold Ice Cream

Gold ice cream represents more than just a dessert; it’s an experience. It’s about indulging in a treat that goes beyond taste — it’s about celebrating opulence, enjoying the thrill of luxury, and enjoying a dish that makes a statement. Whether you’re celebrating a special occasion or simply want to indulge in the most decadent dessert, gold ice cream offers an unforgettable and truly exclusive experience.

For those looking to treat themselves or their loved ones to something extraordinary, gold ice cream stands as the ultimate indulgence in the world of fine dining.

The Best Caviar in the World: A Guide to Luxury’s Finest Delights

Caviar, often regarded as one of the most luxurious and refined delicacies in the world, has long been a symbol of wealth, opulence, and sophistication. Its delicate, briny flavor and smooth, melt-in-your-mouth texture make it a treat that excites the most discerning palates. From its origins in Russia and Iran to the modern production of farmed caviar around the world, the journey of caviar has evolved. Yet, the desire for the finest quality remains unchanged.

If you’re looking to indulge in the best caviar money can buy, this article will guide you through the most sought-after varieties and explain what makes them so special.


What is Caviar?

Caviar consists of the roe (eggs) of sturgeon fish. These eggs are carefully harvested, cured with salt, and then packaged for sale. The quality of caviar is determined by a number of factors, including the species of sturgeon, the freshness of the eggs, the method of preparation, and how they are handled during processing.

Traditionally, the best caviar comes from the Caspian Sea, an area historically known for producing top-tier roe from the Beluga, Osetra, and Sevruga sturgeon. However, in recent years, sustainable farming practices in other parts of the world have allowed for the production of equally remarkable caviar.


Top Varieties of Caviar

When it comes to choosing the best caviar, the type of sturgeon from which the roe is harvested plays a significant role in determining the flavor profile and texture. Here are the most coveted types of caviar:

1. Beluga Caviar

  • Origin: Caspian Sea (Russia and Iran)
  • Flavor: Delicate, buttery, and creamy with a subtle sweetness.
  • Texture: Large, smooth eggs that pop easily when eaten.
  • Why It’s the Best: Beluga caviar is often considered the king of all caviars. It comes from the Beluga sturgeon, one of the largest fish species, and its roe is renowned for its size and soft, velvety texture. The flavor is rich and luxurious, making it the go-to choice for the most discerning caviar lovers. However, due to overfishing, the Beluga sturgeon is now endangered, which has made Beluga caviar extremely rare and expensive.

2. Osetra Caviar

  • Origin: Caspian Sea, Black Sea (Russia, Iran, and other regions)
  • Flavor: Nutty, briny, and slightly earthy with a clean finish.
  • Texture: Medium-sized eggs with a firm pop.
  • Why It’s the Best: Osetra caviar is prized for its complex, nutty flavor. The roe is smaller than Beluga but still offers a luxurious mouthfeel. Osetra is often considered a perfect balance of taste, texture, and richness. It’s the preferred choice of many top chefs and caviar connoisseurs due to its versatility in pairing with other delicacies and fine wines.

3. Sevruga Caviar

  • Origin: Caspian Sea (Russia and Iran)
  • Flavor: Briny, clean, and sharp with a hint of iodine.
  • Texture: Small eggs with a firmer texture than Beluga and Osetra.
  • Why It’s the Best: Sevruga caviar is produced by the Sevruga sturgeon, and while it is smaller in size, it’s no less luxurious. The roe has a bold, intense flavor, making it ideal for those who prefer a more robust caviar experience. Sevruga caviar is often the most affordable of the three “traditional” types (Beluga, Osetra, and Sevruga) but still considered top-tier.

4. Kaluga Caviar

  • Origin: Amur River (China and Russia)
  • Flavor: Similar to Osetra but richer and smoother, with buttery, creamy notes.
  • Texture: Large, firm eggs with a satisfying pop.
  • Why It’s the Best: Kaluga caviar comes from a species related to Beluga sturgeon, but it is farmed sustainably in the Amur River. The flavor is rich and complex, akin to Beluga, making it a premium option for those seeking a less rare but equally luxurious alternative. Its sustainable farming practices have made it a favorite among environmentally conscious connoisseurs.

5. White Sturgeon Caviar

  • Origin: United States (California)
  • Flavor: Mild, clean, and slightly sweet with a delicate briny finish.
  • Texture: Medium-sized eggs with a firm pop.
  • Why It’s the Best: White Sturgeon caviar, produced in the U.S., is a popular alternative to the traditional Caspian Sea caviars. It has a flavor profile similar to Osetra, but with its own unique sweet, clean finish. This variety is sustainably farmed and increasingly sought after for its mild, approachable taste and high quality.

6. Siberian Sturgeon Caviar

  • Origin: Russia, Europe, and North America
  • Flavor: Milder than Osetra, with a fresh, delicate flavor profile.
  • Texture: Small, firm eggs that offer a satisfying pop.
  • Why It’s the Best: Siberian Sturgeon caviar offers an affordable, high-quality alternative to more expensive varieties like Beluga and Osetra. It’s known for its delicate flavor, smooth texture, and sustainable farming practices. This caviar has a milder, less briny flavor, making it a great option for those new to caviar.

7. Hackleback Caviar

  • Origin: United States (Mississippi and Ohio Rivers)
  • Flavor: Briny with a slight nutty undertone and earthy depth.
  • Texture: Small, firm eggs with a quick pop.
  • Why It’s the Best: Hackleback caviar is a domestic American product derived from the Hackleback sturgeon. It has a slightly nutty, clean flavor that appeals to many caviar lovers. It’s also more affordable compared to more traditional varieties, making it a great entry-level caviar without compromising on quality.

Why Caviar is So Expensive

The high price of premium caviar is due to several factors:

  • Rare Sturgeon Species: The best caviar comes from sturgeon, many of which are endangered or slow to reproduce. This makes their roe both rare and highly sought after.
  • Labor-Intensive Harvesting Process: Harvesting caviar is an intricate and delicate process. Sturgeon are carefully handled, and the eggs are removed without damaging the roe. The entire process can take several years, as sturgeon do not reach maturity until they are about 15 years old.
  • Curing and Preservation: Caviar must be carefully salted and processed to maintain its delicate flavor and texture. The quality of the salt and the curing process plays a major role in the final product.
  • Sustainability: With the overfishing of wild sturgeon populations, much of the best caviar is now farmed sustainably. This sustainable production ensures that caviar remains available for future generations, but it also adds to the cost.

How to Enjoy the Best Caviar

Caviar is often served as an appetizer or as part of a luxurious spread. Here are some tips on how to enjoy your caviar:

  • Serve it Chilled: Caviar is best served on a chilled platter or in a bowl set over ice to maintain its freshness.
  • Pair with Simple Accompaniments: Traditional accompaniments include blini (small Russian pancakes), buttered toast points, sour cream, and finely chopped onions or hard-boiled eggs. Keep it simple — you don’t want to overshadow the caviar’s delicate flavor.
  • Use Non-Metallic Utensils: To preserve the caviar’s flavor, serve it with mother-of-pearl spoons or other non-metallic utensils. Metal can alter the taste.
  • Pair with Champagne or Vodka: A classic pairing with caviar is a glass of chilled champagne, as the bubbles complement the richness of the roe. Alternatively, chilled vodka can also enhance the caviar experience with its clean, crisp finish.

The Pinnacle of Luxury

Caviar is the epitome of luxury dining, and indulging in the finest varieties — whether it’s Beluga, Osetra, or Kaluga — is an experience like no other. Its rich history, complex flavor profiles, and cultural significance make it a unique delicacy that has stood the test of time.

As with any gourmet food, selecting the right caviar is about personal preference, but the rarest and most sought-after varieties (like Beluga and Osetra) offer a one-of-a-kind experience that will transport you to a world of indulgence. Whether you’re savoring it at a special occasion or as part of an exclusive dinner, the best caviar in the world promises to make your taste buds sing with pleasure.

The Ultimate Guide to Cooking Steak: Tips, Techniques, and Flavor Secrets

Steak is a culinary classic loved for its rich, savory flavor and tender texture. Whether you’re cooking for a special occasion, a casual dinner, or a weeknight meal, perfecting your steak-cooking skills can elevate any meal. With so many different cuts and cooking methods available, it’s easy to get overwhelmed, but fear not — cooking steak at home is simpler than you might think.

In this guide, we’ll break down the essentials of cooking steak, including choosing the right cut, preparation tips, different cooking methods, and how to achieve the perfect steak every time. Whether you’re grilling, pan-searing, or broiling, these tips will help you bring out the best in your steak.


Choosing the Right Cut of Steak

The first step in cooking a great steak is selecting the right cut. Different cuts of steak offer various textures, flavors, and price points. Here’s a rundown of the most popular steak cuts:

1. Ribeye

  • Flavor: Rich, juicy, and full of marbling (fat streaks within the meat), making it one of the most flavorful cuts.
  • Best Cooking Method: Grilling or pan-searing.
  • Ideal Doneness: Medium-rare to medium. Ribeyes are best cooked to medium-rare to medium, as overcooking can make them tough.

2. Filet Mignon

  • Flavor: Extremely tender with a mild flavor, often considered the most delicate steak cut.
  • Best Cooking Method: Pan-searing or grilling.
  • Ideal Doneness: Medium-rare. Filet mignon is lean, so it’s important not to overcook it; medium-rare will preserve its tenderness.

3. New York Strip (Striploin)

  • Flavor: Slightly firmer than ribeye, but still flavorful with a good balance of tenderness and beefy taste.
  • Best Cooking Method: Grilling or pan-searing.
  • Ideal Doneness: Medium-rare to medium. The striploin retains its tenderness at these temperatures while still allowing the beefy flavor to shine.

4. T-Bone

  • Flavor: A combination of the tenderloin and strip steak, offering a mix of tenderness and flavor.
  • Best Cooking Method: Grilling or broiling.
  • Ideal Doneness: Medium-rare to medium. Because of the bone, T-bones take longer to cook, so aim for medium-rare to medium for optimal flavor and tenderness.

5. Flank Steak

  • Flavor: Lean with a pronounced beefy flavor but less tenderness. Great for marinating.
  • Best Cooking Method: Grilling or pan-searing.
  • Ideal Doneness: Medium-rare. Flank steak should be sliced thinly against the grain to maximize tenderness.

6. Skirt Steak

  • Flavor: Similar to flank steak, it has a rich, beefy flavor, though it’s a bit more tender.
  • Best Cooking Method: Grilling or pan-searing.
  • Ideal Doneness: Medium-rare. Skirt steak cooks quickly, so it’s best to avoid overcooking.

Preparation: Getting Your Steak Ready to Cook

Before cooking, there are a few important steps to ensure your steak turns out perfectly.

1. Bring Steak to Room Temperature

Take your steak out of the fridge 30-60 minutes before cooking. This allows the steak to cook more evenly, avoiding the outside being overcooked while waiting for the inside to come up to temperature.

2. Seasoning

Simple seasoning is often the best way to bring out the natural flavor of the steak. All you need is:

  • Salt: Kosher salt is ideal for seasoning, as it sticks to the steak and enhances the flavor.
  • Pepper: Freshly ground black pepper adds a bit of spice and complements the savory richness of the beef.
  • Optional: Garlic powder, onion powder, or fresh herbs (like rosemary or thyme) can be added for extra flavor. You can also marinate tougher cuts like flank or skirt steak for additional flavor.

Note: It’s best to season the steak just before cooking to prevent the salt from drawing out moisture.


Cooking Methods: How to Cook the Perfect Steak

There are several ways to cook steak, each with its own set of techniques. We’ll cover the three most popular methods — grilling, pan-searing, and broiling.

1. Grilling

Grilling adds a smoky, charred flavor to the steak, which is perfect for cuts like ribeye, strip steak, and T-bone.

How to Grill Steak:

  1. Preheat the Grill: Heat your grill to high heat, around 450°F to 500°F (232°C to 260°C), and make sure the grates are clean.
  2. Sear the Steak: Place the steak on the grill, directly over the heat. Grill for 2-5 minutes per side, depending on the thickness and desired doneness.
  3. Check Internal Temperature: Use a meat thermometer to check the internal temperature of the steak. For medium-rare, aim for 130-135°F (54-57°C).
  4. Rest the Steak: After grilling, let the steak rest for 5-10 minutes before cutting into it. This allows the juices to redistribute and keeps the steak tender and juicy.

2. Pan-Searing

Pan-searing is a quick, easy method that works well with most cuts, particularly ribeye, filet mignon, and New York strip.

How to Pan-Sear Steak:

  1. Preheat the Pan: Heat a heavy skillet (cast iron is ideal) over medium-high heat. Add a tablespoon of oil with a high smoke point (vegetable oil, canola oil, or grapeseed oil).
  2. Sear the Steak: Once the oil is hot and shimmering, place the steak in the pan. For a thick steak, sear for 3-4 minutes per side until a rich, brown crust forms.
  3. Add Butter and Aromatics (Optional): During the last minute of cooking, add a tablespoon of butter, crushed garlic, and fresh herbs (like rosemary or thyme) to the pan. Tilt the pan and spoon the melted butter over the steak to enhance flavor.
  4. Check Internal Temperature: For medium-rare, aim for 130-135°F (54-57°C).
  5. Rest the Steak: Let the steak rest for 5-10 minutes before slicing.

3. Broiling

Broiling is like upside-down grilling, where the heat comes from above. It’s a great option when you don’t have a grill.

How to Broil Steak:

  1. Preheat the Broiler: Set your oven’s broiler to high and let it preheat for 5-10 minutes.
  2. Position the Rack: Place the oven rack 4-6 inches from the broiler element for optimal heat distribution.
  3. Broil the Steak: Place the steak on a broiler pan or a wire rack set on top of a baking sheet. Broil for 4-5 minutes per side, depending on thickness and desired doneness.
  4. Check Internal Temperature: Again, use a meat thermometer to check for your desired doneness.
  5. Rest the Steak: Let the steak rest before serving.

How to Tell When Steak Is Done

One of the most important skills in cooking steak is knowing when it’s done. The best way to measure doneness is by using a meat thermometer, but you can also use the finger test or cut into the steak to check.

Internal Temperatures for Steak:

  • Rare: 120-125°F (49-52°C) — cool, red center.
  • Medium-Rare: 130-135°F (54-57°C) — warm, red center with pink juices.
  • Medium: 140-145°F (60-63°C) — hot, pink center with slightly pink juices.
  • Medium-Well: 150-155°F (66-68°C) — mostly brown center with slight pink.
  • Well-Done: 160°F (71°C) and above — fully brown throughout, very firm.

Resting Your Steak

After cooking, allow your steak to rest for about 5-10 minutes. This is essential because it lets the juices redistribute, ensuring a juicy, tender steak. If you cut into the steak immediately after cooking, the juices will spill out, leaving you with a dry piece of meat.


Enjoying Your Perfect Steak

Cooking steak at home doesn’t have to be intimidating. With the right technique, some simple seasoning, and a little practice, you can create a restaurant-quality steak in your own kitchen. Whether you’re grilling, pan-searing, or broiling, the key is to choose the right cut, cook it to the perfect temperature, and let it rest before slicing into it.

Steak is a versatile and satisfying dish that can be customized to your preferences, whether you prefer a simple preparation or a more elaborate seasoning. So next time you fire up the grill or heat up the pan, keep these tips in mind, and you’ll be enjoying a perfectly cooked steak in no time. Happy cooking!

How to Keep Food from Spoiling: Tips for Freshness and Food Safety

Food spoilage is something that can lead to waste, unnecessary costs, and even foodborne illnesses. Fortunately, there are several effective ways to preserve food, extend its shelf life, and reduce the likelihood of spoilage. By using the right storage techniques, paying attention to temperature control, and knowing which foods are more prone to spoiling, you can keep your food fresh and safe for longer. In this article, we’ll explore strategies to prevent food from spoiling, so you can enjoy your meals without worrying about waste or safety concerns.


1. Proper Temperature Control

Maintaining the right temperature is one of the most important factors in preventing food from spoiling. The growth of harmful bacteria, molds, and yeasts is accelerated at higher temperatures, so storing food at the proper temperature is key.

Refrigeration

Most perishable foods, including dairy, meat, poultry, fish, eggs, and certain fruits and vegetables, need to be refrigerated to slow bacterial growth. The refrigerator should be set to 40°F (4°C) or lower. For optimal freshness:

  • Store raw meat and poultry on the bottom shelf of the fridge to prevent cross-contamination.
  • Keep dairy products in the coldest part of the fridge, often towards the back, away from the door where temperatures fluctuate.
  • Make sure the fridge is not overcrowded to allow for proper air circulation, which helps maintain consistent temperature.

Freezing

Freezing is an excellent method for preserving foods long-term. Freezing slows down bacterial growth and helps maintain the nutritional value and taste of food. For best results:

  • Store foods in airtight containers or freezer bags to prevent freezer burn.
  • Label everything with the date to ensure you use frozen items before they lose quality.
  • Some foods (like fruits and vegetables) benefit from blanching (briefly boiling or steaming them) before freezing to preserve texture and flavor.

Room Temperature Storage

Some foods don’t need refrigeration and can be safely stored at room temperature. However, it’s essential to know which foods these are:

  • Dry grains (rice, pasta), canned goods, and root vegetables (potatoes, onions) are best stored in a cool, dry place, away from sunlight.
  • Fruits like bananas, apples, and tomatoes often do better at room temperature. However, be mindful of ethylene-producing fruits (like apples, bananas, and avocados), which can speed up ripening in other fruits and vegetables.

2. Use Airtight Containers and Proper Packaging

Exposing food to air can cause it to spoil faster due to oxidation and moisture buildup. By storing food in airtight containers, you can maintain freshness, prevent the absorption of odors, and limit exposure to contaminants.

  • Glass containers or plastic storage bins with tight-fitting lids are great for storing dry and refrigerated foods. They prevent moisture from entering and protect food from absorbing unpleasant odors in the fridge.
  • Vacuum-sealing is an effective way to preserve the quality of meats, fruits, and vegetables. It removes air from packaging, keeping the food fresh for longer.
  • Resealable plastic bags can be used for smaller portions of fruits, vegetables, and leftovers. Squeeze out as much air as possible to extend their shelf life.
  • Wrapping with foil or wax paper is a great way to prevent moisture loss in foods like cheeses or meats, but you’ll still need an airtight container or a freezer bag for long-term storage.

3. Mind the Expiration Dates and FIFO

It’s important to pay attention to the expiration dates and best-before dates on food packaging. While these dates aren’t always a perfect indicator of safety (many foods remain good past these dates), they are a useful guide for ensuring you use the oldest products first.

  • FIFO (First In, First Out) is a good practice to prevent food waste. Keep older products at the front of your pantry, fridge, or freezer so you remember to use them before they expire.
  • Regularly check your food items and discard anything that is past its prime or showing signs of mold, spoilage, or an off-smell.

4. Understand How to Store Different Foods

Not all foods are created equal when it comes to storage. Some perish quickly, while others last much longer. Understanding how to store different foods can help you avoid spoilage.

Fruits and Vegetables

Some fruits and vegetables spoil quickly if not stored properly. Here’s how to extend their shelf life:

  • Leafy greens: Store in a damp paper towel and place in a resealable bag in the fridge. This helps to maintain moisture while preventing wilting.
  • Root vegetables (carrots, beets, potatoes): Store them in a cool, dark, and dry place (not in the fridge). Potatoes, for example, should be kept in a ventilated container to prevent sprouting.
  • Berries: Keep them dry and in a breathable container in the fridge. If possible, only wash berries right before eating, as excess moisture can speed up mold growth.
  • Apples and bananas: Store at room temperature, but keep them separate from other fruits to prevent them from ripening too quickly due to ethylene gas.

Dairy Products

Dairy products are particularly prone to spoilage, so it’s essential to keep them properly stored:

  • Milk and cream should be kept in their original containers and stored in the coldest part of the fridge.
  • Cheese should be wrapped tightly in wax paper, parchment paper, or plastic wrap, and stored in an airtight container or resealable bag.
  • Keep butter in the fridge, though it can be kept at room temperature for short periods (1–2 days) for easier spreading.

Meat and Fish

Raw meats and fish are highly perishable and require special attention:

  • Store raw meats and poultry in the coldest part of the fridge, ideally in their original packaging. Use within the recommended timeframe.
  • Cooked meats should be stored in airtight containers to prevent contamination and keep them from drying out.
  • Fish is highly perishable and should ideally be eaten within a day or two of purchase. If freezing, wrap fish tightly in plastic wrap or aluminum foil before placing it in an airtight container.

5. Prevent Cross-Contamination

Cross-contamination is a major cause of foodborne illness and can lead to food spoilage. To keep food safe:

  • Separate raw meats from vegetables, fruits, and ready-to-eat foods. Use separate cutting boards and utensils for raw meats.
  • Clean hands and surfaces regularly when handling food, especially when working with raw meats, poultry, and fish.
  • Store raw meats in leak-proof bags or containers on the lowest shelf in the fridge to avoid drips onto other foods.

6. Use Preserving Techniques (Canning, Pickling, Fermenting)

For long-term preservation, various techniques like canning, pickling, and fermenting can keep food from spoiling. These methods not only extend shelf life but can also add interesting flavors to your dishes.

  • Canning is a process that involves sealing foods (usually fruits, vegetables, and jams) in jars under heat to prevent the growth of bacteria.
  • Pickling involves preserving food in vinegar, salt, and water to create a tangy, acidic environment that discourages bacterial growth.
  • Fermenting preserves food through beneficial bacteria, resulting in a tangy flavor and probiotic benefits (e.g., kimchi, sauerkraut, yogurt).

7. Be Mindful of Humidity and Airflow

Excess moisture can promote mold and bacteria growth, leading to spoiled food. Likewise, lack of airflow can cause food to wilt or lose its freshness. Consider the following:

  • Dry foods: Store grains, cereals, and pasta in airtight containers in a cool, dry place.
  • Fruits and vegetables: Use perforated plastic bags or containers designed to allow airflow, especially for high-moisture foods like lettuce or berries.
  • Avoid storing potatoes and onions in plastic bags, as they need ventilation to stay fresh.

Smart Storage for Fresher Food

Keeping food fresh and preventing spoilage is about maintaining the right temperature, using proper storage techniques, and understanding the specific needs of different foods. By following these tips—whether it’s refrigerating perishables, using airtight containers, or freezing excess food—you can reduce waste, save money, and keep your meals safe and delicious for longer.

With a bit of knowledge and planning, you’ll be able to enjoy your food at its freshest, and avoid the frustrations and costs associated with spoilage. It’s all about knowing how to store, when to consume, and being aware of how different foods behave over time. Happy cooking—and even happier, fresher eating!

Rosemary: The Aromatic Herb That Elevates Your Cooking

When it comes to aromatic herbs, few are as beloved and versatile as rosemary. With its fragrant, pine-like aroma and robust flavor, rosemary has been a staple in kitchens worldwide for centuries. Whether you’re a home cook or a professional chef, this herb can elevate dishes, enhance flavors, and even provide a health boost. From savory meats to hearty stews, rosemary brings a fresh, woody essence that can make any meal shine.

In this article, we’ll explore the culinary and health benefits of rosemary, how to use it in your cooking, and how to grow and store this fantastic herb.


What is Rosemary?

Rosemary (Rosmarinus officinalis) is a fragrant, evergreen shrub native to the Mediterranean region. It belongs to the mint family, which includes other well-known herbs such as thyme, oregano, and basil. The plant produces narrow, needle-like leaves that are aromatic, with a distinct pine-like scent that is both earthy and slightly citrusy.

Rosemary’s versatility and long shelf life make it a prized herb in the culinary world. It’s commonly found fresh, dried, or ground into a powder. While it’s most often associated with Mediterranean and Italian cuisine, rosemary has global appeal and can be used in a variety of dishes across different cultures.


Culinary Uses of Rosemary

Rosemary’s flavor is bold and savory, making it perfect for dishes that need a strong, earthy kick. Here are some of the best ways to incorporate rosemary into your cooking:

1. Roasted Meats and Vegetables

One of the most popular uses for rosemary is to infuse roasted meats with its distinct flavor. The herb pairs particularly well with hearty meats like lamb, chicken, and beef, as well as roasted root vegetables like potatoes, carrots, and sweet potatoes.

  • Rosemary Roasted Chicken: Add fresh sprigs of rosemary under the skin of a whole chicken or mix chopped rosemary with olive oil and garlic to rub over the bird before roasting. The rosemary infuses the meat with its aromatic flavor while helping to keep the chicken juicy.
  • Roasted Vegetables: Toss potatoes, carrots, or zucchini with olive oil, garlic, and chopped rosemary before roasting for a simple yet flavorful side dish.

2. Flavoring Oils and Vinegars

Rosemary can be used to infuse oils and vinegars, creating flavorful bases for dressings, marinades, and sauces. It’s a great way to incorporate its bold flavor into recipes that require oil or vinegar as a base ingredient.

  • Rosemary Infused Olive Oil: Heat olive oil in a pan with a few sprigs of rosemary until the oil is fragrant, then allow it to cool. This infused oil can be used as a dressing for salads, a dip for bread, or to drizzle over grilled meats and vegetables.
  • Rosemary Vinegar: Add a few sprigs of rosemary to vinegar (such as balsamic or white wine vinegar) and let it steep for a few weeks. This flavored vinegar can be used in salad dressings or marinades.

3. Soups and Stews

Rosemary’s earthy, woodsy flavor can deepen the complexity of soups and stews. Whether you’re making a hearty lamb stew, a vegetable soup, or a tomato-based sauce, a sprig or two of rosemary can enhance the overall taste.

  • Lamb Stew: Rosemary is a classic herb used in stews, especially those with lamb. Add fresh sprigs early in the cooking process and remove before serving to infuse the stew with a rich, savory flavor.
  • Tomato Sauce: Add a sprig of rosemary to a simmering tomato sauce for pasta or pizza. The herb complements the acidity of the tomatoes and brings a layer of depth to the sauce.

4. Breads and Focaccia

Rosemary is a fantastic herb to add to bread recipes, particularly rustic or Mediterranean-style breads like focaccia. Its sharp, piney flavor pairs wonderfully with olive oil and garlic.

  • Rosemary Focaccia: Incorporate chopped rosemary into focaccia dough, and sprinkle some on top with coarse sea salt and olive oil before baking. The result is a fragrant, savory bread perfect for serving alongside soups or as a snack with dips.

5. Infused Butter or Compound Butter

A simple yet elegant way to enjoy rosemary is by incorporating it into compound butter. Rosemary-infused butter is perfect for spreading on warm bread, melted over grilled meats, or used to sauté vegetables.

  • Rosemary Garlic Butter: Mix softened butter with chopped fresh rosemary, minced garlic, and a pinch of salt. This compound butter can be used to top steak, roasted chicken, or as a dip for fresh bread.

6. Baked Goods and Desserts

While rosemary is typically used in savory dishes, its aromatic flavor can also shine in sweet recipes. When paired with ingredients like citrus, honey, and chocolate, rosemary creates a unique contrast that adds complexity to desserts.

  • Rosemary Lemon Cookies: The fresh citrusy zing of lemon paired with the earthy, piney notes of rosemary makes for an unexpected yet delightful flavor combination in cookies.
  • Chocolate Rosemary Cake: The rich bitterness of chocolate and the herbal quality of rosemary are a perfect match in decadent cakes or brownies.

Health Benefits of Rosemary

In addition to its culinary uses, rosemary has been traditionally used for its medicinal properties. While more research is needed to fully understand the extent of its health benefits, several potential advantages of rosemary have been widely acknowledged:

1. Rich in Antioxidants

Rosemary contains powerful antioxidants, such as rosmarinic acid and carnosic acid, that help protect cells from oxidative damage. Antioxidants are essential for neutralizing free radicals in the body, which can contribute to aging and the development of chronic diseases.

2. Enhances Digestion

Rosemary has been used as a digestive aid for centuries. It can help alleviate indigestion, bloating, and gas by stimulating the production of bile and improving overall digestive function. A warm cup of rosemary tea can be particularly soothing after a heavy meal.

3. Anti-Inflammatory Properties

The compounds found in rosemary, such as rosmarinic acid, have natural anti-inflammatory effects. This may help reduce inflammation in the body and alleviate symptoms of conditions like arthritis or muscle pain. Rosemary essential oil is often used in aromatherapy or topical treatments for muscle aches.

4. Cognitive Benefits

Some studies suggest that rosemary may help enhance memory and concentration. It’s thought to stimulate circulation to the brain and may even improve overall cognitive function. Rosemary essential oil has also been used in aromatherapy to boost mental clarity and focus.


How to Grow and Store Rosemary

Rosemary is relatively easy to grow in a garden or on a windowsill, making it an excellent herb to have on hand for cooking. Here are a few tips for growing and storing rosemary:

1. Growing Rosemary

  • Sunlight: Rosemary loves sunlight, so plant it in a sunny spot where it can get at least 6-8 hours of direct sunlight each day.
  • Well-Drained Soil: Rosemary prefers well-drained, slightly alkaline soil. Be sure to plant it in a pot with good drainage or in the ground with loose soil.
  • Watering: Rosemary is drought-tolerant, so it doesn’t need frequent watering. Allow the soil to dry out between waterings to prevent root rot.
  • Pruning: Regularly prune rosemary to keep the plant compact and encourage new growth. You can use the fresh sprigs as you need them.

2. Storing Rosemary

  • Fresh Rosemary: Store fresh rosemary in the refrigerator, wrapped in a damp paper towel and placed in a plastic bag. It will stay fresh for up to a week.
  • Dried Rosemary: To dry rosemary, hang sprigs upside down in a warm, dry place, or use a dehydrator. Once dried, remove the leaves from the stems and store them in an airtight container away from direct sunlight.
  • Frozen Rosemary: If you have a surplus, you can freeze rosemary by placing the sprigs in a freezer-safe bag. Alternatively, freeze chopped rosemary in ice cube trays with olive oil for easy portioning.

Rosemary’s Flavorful Impact on Your Cooking

Rosemary is much more than just a fragrant herb. With its robust flavor and numerous health benefits, it’s an essential ingredient in both the culinary and wellness worlds. Whether you’re roasting meats, infusing oils, or baking aromatic breads, rosemary can add depth and complexity to a variety of dishes. Its ability to complement savory and sweet flavors alike makes it one of the most versatile herbs in your kitchen.

So, next time you’re preparing a meal, consider reaching for a sprig of rosemary—its fragrant, piney notes will elevate your dish and bring a touch of Mediterranean magic to your table.

The Power of Nuts: Cooking with Nutrients, Flavor, and Versatility

Nuts are not only a healthy snack option but also an incredibly versatile ingredient in the kitchen. Packed with healthy fats, protein, fiber, vitamins, and minerals, they’re a powerhouse food that can enhance a wide range of dishes, from savory to sweet. Whether you’re looking to add crunch, creaminess, or a rich, nutty flavor to your meals, nuts can elevate your cooking in countless ways.

In this article, we’ll explore the cooking benefits of nuts, how to incorporate them into your meals, and the best types of nuts to use for various cooking techniques.


Why Nuts Are a Healthy Addition to Your Cooking

Before diving into the ways you can cook with nuts, let’s first take a look at why nuts are such a nutritious choice.

1. Rich in Healthy Fats

Nuts are high in monounsaturated and polyunsaturated fats, which are heart-healthy fats that help reduce bad cholesterol levels and promote cardiovascular health. These fats are also known to provide long-lasting energy and help your body absorb fat-soluble vitamins like vitamins A, D, E, and K.

2. Excellent Source of Protein

Nuts provide a substantial amount of plant-based protein, which is crucial for muscle repair and growth. They’re an excellent source of protein for vegetarians, vegans, or anyone looking to incorporate more plant-based options into their diet.

3. Packed with Fiber

Many nuts are high in fiber, which supports digestion, helps regulate blood sugar levels, and promotes a feeling of fullness. Fiber also plays a key role in heart health by lowering cholesterol and improving gut function.

4. Full of Essential Nutrients

Nuts are rich in a variety of essential vitamins and minerals, including vitamin E (an antioxidant), magnesium (important for muscle and nerve function), and zinc (which supports the immune system). They also provide iron, calcium, and potassium—vital nutrients for overall health.


How to Incorporate Nuts into Your Cooking

Nuts can be used in a wide variety of ways in cooking and baking. Here are some ideas to inspire you:

1. As a Crunchy Topping or Garnish

Nuts can add a satisfying crunch to dishes, making them perfect as toppings or garnishes. Whether sprinkled on salads, soups, oatmeal, or roasted vegetables, a handful of chopped or whole nuts can enhance texture and flavor.

  • Salads: Toasted almonds, walnuts, or pecans add a delicious crunch to green salads, especially when paired with tangy dressings like balsamic vinegar or citrus-based dressings.
  • Soups: Roasted cashews or pine nuts can be sprinkled on creamy soups like butternut squash or tomato for added texture and flavor.
  • Oatmeal & Breakfast Bowls: Chopped walnuts, almonds, or hazelnuts can elevate your morning oatmeal or smoothie bowls, providing extra protein and fiber.

2. Nut Butters: Smooth, Creamy, and Versatile

Nut butters, such as almond butter, peanut butter, and cashew butter, are a kitchen staple. They’re great for spreading on toast, drizzling over pancakes, or incorporating into sauces and dressings. Nut butters add richness and flavor to a variety of dishes.

  • Smoothies: Add a spoonful of almond butter or peanut butter to your smoothie for a creamy texture and extra protein boost.
  • Sauces and Dressings: Nut butters, particularly peanut butter or tahini (made from sesame seeds), can be blended into sauces or dressings for Asian-inspired dishes. A simple peanut sauce can transform a vegetable stir-fry or noodle bowl.

3. Baking with Nuts

Nuts are a great addition to baked goods, bringing flavor, texture, and nutrition. From cookies and cakes to breads and muffins, nuts can enhance the taste and make your treats more filling.

  • Cookies & Bars: Chopped walnuts or pecans are classic additions to chocolate chip cookies or oatmeal bars. They add both crunch and a rich, nutty flavor.
  • Cakes & Muffins: Nuts like almonds or hazelnuts can be incorporated into cake batters or muffin mixes for a subtle crunch. Nut meal (finely ground nuts) can also replace part of the flour in gluten-free baking.
  • Bread: Add chopped nuts to the dough of homemade bread or sprinkle on top of focaccia or baguettes before baking.

4. Nut Flours: A Gluten-Free Alternative

Nut flours, made from finely ground nuts like almonds, hazelnuts, or walnuts, are excellent substitutes for traditional wheat flour in gluten-free baking. These flours add a unique flavor and moisture to baked goods while still providing a good dose of protein and fiber.

  • Almond Flour: One of the most popular nut flours, almond flour is commonly used in gluten-free cookies, cakes, and bread. It creates a moist, tender texture and slightly nutty flavor.
  • Hazelnut Flour: Hazelnut flour can bring a rich, slightly sweet flavor to pastries, muffins, and cookies, making it a great choice for nut-based desserts.

5. Nut Oils: For Cooking or Drizzling

Nuts like almonds, hazelnuts, and walnuts are often used to create flavorful oils that can be used in various cooking methods. Nut oils are perfect for sautéing, dressing salads, or finishing off a dish with a drizzle of rich, nutty flavor.

  • Walnut Oil: This oil has a mild, slightly earthy flavor that’s great for drizzling over roasted vegetables or in salad dressings.
  • Almond Oil: With its delicate flavor, almond oil works wonderfully for lightly sautéing vegetables or finishing off baked goods.
  • Hazelnut Oil: The rich, toasty flavor of hazelnut oil is perfect for vinaigrettes or drizzling over roasted meats and vegetables.

6. Nut Crusts and Coatings

Nuts can also be ground into crumbs or used as coatings for meat, fish, or vegetables. Nut crusts add a savory, crunchy exterior to proteins and can be used as a gluten-free alternative to traditional breading.

  • Nut-Crusted Chicken or Fish: Ground almonds, cashews, or pistachios can be used as a crust for chicken breasts, fish fillets, or even tofu. The nuts provide a crunchy texture while adding rich flavor.
  • Vegetable Coatings: Coating roasted vegetables like eggplant or zucchini with ground nuts before baking gives them a crispy, golden finish.

7. Nut-Based Dairy Alternatives

For those looking to avoid dairy, nuts are an excellent base for creating creamy, non-dairy alternatives. Nut milks, nut cheeses, and creamy nut sauces can be used in various dishes to replace traditional dairy.

  • Nut Milk: Almond milk, cashew milk, and hazelnut milk are popular dairy-free milk alternatives for use in coffee, smoothies, cereal, or baking.
  • Nut Cheese: Cashews, in particular, are often blended into creamy, vegan cheeses that can be spread on crackers, melted on pizzas, or used in pasta dishes.
  • Creamy Sauces: Cashews or almonds can be blended with water to create creamy sauces for pasta or vegetables.

Best Nuts for Cooking

Different nuts bring unique flavors and textures to cooking, so it’s important to choose the right type for your dish. Here are some of the most commonly used nuts in cooking:

  • Almonds: Versatile and mild, almonds can be used in everything from baked goods to salads to savory dishes. Almonds are also available in different forms, such as slivered, chopped, whole, or ground into flour.
  • Cashews: Creamy and mild, cashews are ideal for making nut butters, dairy alternatives, or creamy sauces. They also work well in stir-fries, curries, and even desserts.
  • Pecans: Sweet and buttery, pecans are perfect for baking, especially in pies, cookies, and cakes. They’re also great in salads or as a topping for roasted vegetables.
  • Walnuts: With a slightly bitter flavor, walnuts are excellent in both sweet and savory dishes, from banana bread to salads to pasta sauces.
  • Hazelnuts: Often used in desserts and pastries, hazelnuts add a rich, nutty flavor. They’re especially popular in chocolate-based dishes or roasted for topping salads and meats.
  • Pistachios: With a unique, slightly sweet flavor, pistachios work well in Middle Eastern dishes, as a topping for salads, or as a key ingredient in nut-based desserts.

Unlocking the Cooking Potential of Nuts

Nuts are a flavorful, nutritious addition to any kitchen. Whether you’re looking to add texture, flavor, or nutrition to your dishes, nuts can be used in a wide variety of ways, from savory meals to sweet treats. They’re packed with healthy fats, protein, fiber, and essential vitamins, making them a great ingredient to boost the nutritional profile of your meals.

So, next time you’re in the kitchen, don’t hesitate to experiment with nuts. Whether it’s adding a sprinkle of chopped almonds to your salad, blending cashews into a creamy sauce, or creating a nut butter for a quick snack, the culinary possibilities are endless. Embrace the versatility of nuts and discover just how delicious and nourishing they can make your cooking!

The Wonderful World of Dairies: Health, Benefits, and Dairy Alternatives

Dairy products have been a staple of human diets for thousands of years, providing essential nutrients such as calcium, protein, and vitamins. From creamy milk to tangy yogurt and rich cheeses, dairy plays a significant role in cultures around the globe. But with modern diets evolving, concerns about lactose intolerance, ethical practices, and plant-based alternatives are leading more people to reconsider the place of dairy in their daily lives. Whether you’re a long-time dairy enthusiast or new to the world of dairy products, understanding their health benefits, the different types of dairy, and emerging alternatives can help you make informed decisions.


What Are Dairy Products?

Dairy products are foods made from milk—most commonly cow’s milk, but also milk from goats, sheep, and other mammals. The core dairy products include:

  • Milk: The most basic and versatile dairy product. It can be consumed on its own or used as a base for many other dairy products.
  • Cheese: Made by coagulating milk, cheese comes in hundreds of varieties, ranging from soft and creamy to hard and aged.
  • Yogurt: A fermented dairy product made by adding beneficial bacteria to milk, yogurt is known for its gut-health benefits.
  • Butter: A rich product made by churning cream, butter is a favorite in cooking and baking.
  • Cream: A high-fat component of milk, used in both cooking and as a topping.
  • Ice Cream: A frozen dairy treat made with milk, cream, sugar, and often flavorings like chocolate or fruit.

These products are made through a variety of processes such as pasteurization, fermentation, and coagulation, each contributing to the unique flavors and textures found in dairy foods.


Nutritional Benefits of Dairy

Dairy is considered a nutrient-dense food, meaning it provides a significant amount of essential nutrients in a relatively small serving. Here are some of the key health benefits:

1. High in Calcium and Vitamin D

Dairy products are one of the best sources of calcium, a mineral that is essential for strong bones and teeth. Many dairy products, like milk and yogurt, are also fortified with vitamin D, which helps the body absorb calcium more effectively. This makes dairy a key player in preventing bone diseases such as osteoporosis.

2. Protein Power

Dairy, particularly milk and cheese, is a good source of high-quality protein. Protein is vital for the growth and repair of tissues, and it plays an important role in immune function, muscle development, and enzyme production.

3. Probiotics for Gut Health

Fermented dairy products like yogurt and kefir contain probiotics—beneficial bacteria that promote healthy digestion. These probiotics can improve gut health by balancing the microbiome, aiding digestion, and supporting the immune system.

4. Rich in B-Vitamins

Dairy is rich in B-vitamins, including B12, riboflavin (B2), and niacin (B3), which are essential for energy production, brain function, and red blood cell formation. Vitamin B12, in particular, is primarily found in animal-based foods, making dairy an important dietary source, especially for vegetarians.


Different Types of Dairy Products

Understanding the various types of dairy products can help you choose what best suits your taste, nutritional needs, and dietary restrictions.

1. Full-Fat vs. Low-Fat vs. Skim Dairy

  • Full-fat dairy: Rich and creamy, full-fat dairy provides a higher amount of calories and fat, including saturated fat. It’s often preferred for its flavor and texture, but it should be consumed in moderation if you’re watching your calorie or fat intake.
  • Low-fat dairy: Contains less fat than full-fat options but retains many of the same nutritional benefits. It’s a popular choice for those seeking a healthier alternative while still enjoying the creamy texture.
  • Skim dairy: This dairy has most of its fat removed, making it the lowest in calories and fat. However, it may lack some of the richness and taste found in full-fat versions.

2. Organic Dairy

Organic dairy comes from cows that are raised without synthetic hormones or antibiotics and are fed organic feed. For some people, the decision to buy organic dairy is tied to concerns about environmental sustainability, animal welfare, and health. However, research on the nutritional differences between organic and non-organic dairy is mixed.

3. Aged vs. Fresh Cheese

Cheese comes in many forms, from fresh cheeses like ricotta and mozzarella to aged varieties like cheddar, gouda, and parmesan. Aged cheeses are firmer, more concentrated in flavor, and often contain less moisture, while fresh cheeses have a mild flavor and higher moisture content.

4. Dairy-Free Alternatives

With the rise of plant-based diets, dairy-free alternatives have become increasingly popular. These products are made from plants like soy, almonds, coconuts, and oats. Some common dairy alternatives include:

  • Almond milk: A low-calorie, nutty-flavored milk substitute.
  • Soy milk: A protein-rich milk alternative that’s often fortified with calcium and vitamin D.
  • Oat milk: A creamy, slightly sweet milk substitute made from oats.
  • Coconut milk: A rich, tropical-flavored alternative that’s high in fat but low in protein.

These dairy substitutes are great for those with lactose intolerance, vegans, or anyone looking to reduce their dairy consumption.


Lactose Intolerance and Dairy Alternatives

Lactose intolerance occurs when the body is unable to properly digest lactose, the sugar found in milk. Symptoms can include bloating, diarrhea, and stomach cramps. For those who are lactose intolerant, there are many options:

  • Lactose-free milk and dairy products: These have the lactose removed or broken down, making them easier to digest.
  • Fermented dairy: Products like yogurt and kefir contain probiotics that may help break down lactose, making them more digestible for some people.
  • Plant-based alternatives: As mentioned earlier, options like almond, soy, and oat milk are naturally lactose-free and can serve as excellent dairy substitutes.

Ethical Considerations in Dairy Farming

While dairy provides numerous benefits, it’s important to consider the ethical implications of dairy farming. Concerns over animal welfare, environmental impact, and the sustainability of large-scale dairy operations have led to increased demand for ethical and sustainable dairy practices.

  • Grass-fed dairy: Cows that graze on natural grass pastures are often considered to produce higher-quality, more ethical dairy products. Grass-fed dairy may also have a different nutritional profile, with higher levels of omega-3 fatty acids and antioxidants.
  • Animal welfare: Ethical dairy producers prioritize humane treatment of animals, ensuring they have access to pasture, are not subjected to harsh conditions, and receive proper care.
  • Environmental concerns: The environmental impact of dairy farming, particularly related to greenhouse gas emissions and land use, has led some people to seek out dairy alternatives or choose sustainably produced dairy.

Is Dairy Right for You?

Dairy products offer numerous health benefits, from supporting strong bones to promoting gut health, but they may not be suitable for everyone. Factors such as lactose intolerance, dietary preferences, and ethical considerations can influence whether dairy is a good choice for you. Thankfully, there are plenty of alternatives available, from lactose-free products to plant-based options, ensuring that everyone can find a suitable way to enjoy their favorite flavors and nutrients.

The key is to enjoy dairy in moderation, opt for high-quality sources, and listen to your body’s needs. Whether you love the richness of cheese, the tang of yogurt, or the comfort of a glass of milk, there’s no denying that dairy plays a vital role in many people’s diets and can be a delicious, nutritious part of a balanced lifestyle.